This whole thing takes about 10 minutes.
Serves 2
Ingredients:
1 filet trout
2 tablespoons flour
1 cup chopped or sliced almonds
2 tablespoons butter
juice of 1/2 lemon
a handful of salad greens
Salt and pepper
a little olive oil for finishing
1) Chop your almonds and toast them in a non-stick pan with 1 tablespoon of butter until the almonds are golden brown and smell amazing. Take the almonds out and set aside.
2) Pat the trout with flour on both sides. My filet had skin, though, so I only did one side. You can also cut it into two pieces so they fit easier in your pan. Season with a little bit of salt and pepper.
3) Melt the remaining tablespoon of butter in the pan. Cook the fish for one and a half minutes on each side. You can add some extra butter and let it it melt if you want more "sauce" (i.e. melted butter) on your fish.
4) Put the greens on the plate, dress with some olive oil, salt and pepper if you want, put the fish on top of that, and the almonds on top of THAT. Then lemon juice!
BONUS TIP: Any time you're cooking meat or fish, you want to make sure that the oil and the pan are nice and hot. If they aren't, the meat won't get that nice brown sear. It will cook okay on the inside, but you'll lose the awesome crispy outside, and it will instead be wan and oily. (Gross.) SO-- a good way to check and make sure that the oil is ready is to take your meat or fish and touch a corner of it to the pan. If it sizzles, you are GOOD TO GO.
I did not dress my salad greens. I figured the buttery almonds were enough.
Wednesday, March 30, 2011
Monday, March 28, 2011
Coq Au Vin
Seriously out of this world!! And this picture doesn't do it justice.
Serves: 6(ish)
Cooking time: 3 hours, give or take
Coq Au Vin, adapted from Smitten Kitchen via Julia Child. A Julie/Liza collaboration.
2 slices of bacon, cut into 1/4" strips.
2 tablespoons butter
1 5 lb. whole chicken, cut into parts
1/3 c brandy
1 bottle of red wine, minus a glass (we used Merlot... because the bottle looked French. And we'll let you decide what do with that extra glass.)
3-4 c chicken stock
1 T tomato paste
2 cloves mashed garlic
1/4 teaspoon thyme
1 bay leaf
3/4 lb mushrooms, quartered
1 bag of white pearl onions (8 oz? I can't remember), blanched and peeled
3 tablespoons flour
2 tablespoons softened butter
Sprigs of fresh parsley
Fresh thyme
Place bacon in heavy cast iron pot or dutch oven and cook, letting the fat render. Note-- we needed to add some oil to help the fat crisp up! Stubborn bacon.
Rinse the chicken and pat dry. Season with salt and pepper. Sear chicken in batches (skin side down first), letting a golden crust develop. Set chicken aside.
Add mushrooms and onions to pot and let them caramelize! Season with salt and pepper, and don't stir too often. Don't be afraid to add a little extra fat (chicken, bacon, oil, butter... pick your poison) if the pan seems to dry. Add tomato paste, garlic, and bay leaf and toast until fragrant. Pour in brandy, scraping all of the browned bits off the bottom of the pan (you may need additional brandy for this, depending on how well your caramelizing went!).
Return the chicken to the pot. Add the red wine and enough stock to completely cover the chicken. Let simmer for 30 minutes or so, or until the chicken is cooked through. Meanwhile, mix the butter and flour into a paste. Remove a cup or two of hot liquid and whisk the butter/flour paste into it. Pour this back into the pot, and simmer an additional 10 minutes. Finish with thyme and parsley!
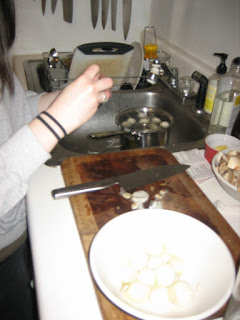
Beautiful prep!
This chicken could have been browner... but we are impatient.
Julie peeling those blanched pearl onions.
Don't you just want to eat that right now!!
Mmmmm, de-glazing.
The whole shebang simmering.
Julie and I started this project around 5:30. It was perfect-- we were able to do it leisurely and it was ready exACTly when we were starting to get hungry, about an hour and a half later. I can't rave about this enough. It was so savory, so rich, so, so, so, EVERYTHING. We served it with a little salad, but I think some nice creamy potatoes would be good too-- you can't let all that sauce go to waste!! Also-- next time I may increase the mushrooms and onions. Though we have a lot of chicken left, we already ate the veggies, my personal favorite part!
Everyone, MAKE THIS! Especially since Winter seems to have come back this week. This will make you cozy AND happy AND full!
Thursday, March 24, 2011
Pad Thai
Better-- but extremely not easier-- than take-out.
Serves 4.
Noodles:
8 oz rice noodles
Tamarind sauce:
5 oz seedless tamarind paste
1/2 cup sugar
juice of 2 limes
2 teaspoons salt
Stir-fry components:
2 tablespoons chopped cilantro
4 tablespoons Asian fish sauce
2 tablespoons rice wine vinegar, plus extra for deglazing*
2 tablespoons sugar
1 tablespoon butter
2 eggs
2 tablespoons milk
4 tablespoons peanut oil, divided
2 tablespoons minced shallot
2 tablespoons grated ginger*
3 cloves garlic, minced
1 lb fresh or frozen uncooked shrimp, peeled and deveined
1 cup bean sprouts
Garnishes:
1 cup bean sprouts
1/2 cup chopped peanuts
3 tablespoons chopped cilantro
3 tablespoons sliced green onion
Sriracha
1 lime, cut into wedges
1) Place the rice noodles in a large bowl and cover with hot (but not boiling) water. Let it soak for at least a half hour, or until the noodles are softened, but have a little bite. Then, drain the noodles.
2) Prepare the tamarind sauce. Add the tamarind paste, sugar, lime juice and salt to a small sauce pan and bring to a boil, breaking up the tamarind with a spoon. It should create a thick, sticky sauce. My tamarind paste was not seedless as advertised, and I had to force it through a strainer afterward. (potchke alert) Set aside.
3) Whisk together the cilantro, fish sauce, rice vinegar, and sugar. Set aside.
4) Melt the butter in a large pot or wok. Beat the egg with the milk, add to the pan, and cook until scrambled. Then set aside.
5) Clean out the pan, add 2 tablespoons of peanut oil and set it back on medium-high heat. When the oil is hot, add the ginger, shallot, garlic and shrimp. Cook for one minute, just until the shrimp gets some color. Add the tamarind sauce and the fish sauce mixture, and stir everything together. Add the noodles and toss, stir-frying until they are totally cooked, 5 minutes or so. If things look a little dry, add some extra peanut oil.
6) Garnish and serve!
I had a package of rice noodles gathering dust in the pantry for, oh, maybe a year. Then, on a lark, I bought a brick of tamarind paste when I spotted it at a Korean grocery store last week. Pad Thai. It had to be done.
I think this one is pretty self-explanatory. I didn't use any chiles...because I forgot to buy some. But I have to say, the sriracha was key. Personally, I found a healthy squirt of sriracha gave it the perfect amount of heat. Get a big bottle of sriracha! Put it on everything! You won't regret it! Everything else... as usual... is sort about what you have on hand and how much of each ingredient you prefer to use. A little bit more or less of each thing is not going to kill this dish.
* BONUS FACT: Ginger is a lot easier to grate if it's frozen. Bonus bonus fact: freezing things also make them last longer. So, keep a hand of ginger in your freezer and you'll never have to remember to buy it at the store. Slice off one end, and-- you don't even have to peel it-- just grate it right over a microplane. You'll get a perfect, very fine, fresh pile of ginger, every time! Do it!
PS Remember the shrimp-infused peanut oil leftover from shrimp tacos? Use it in the stir fry. Aw yeah.
Serves 4.
Noodles:
8 oz rice noodles
Tamarind sauce:
5 oz seedless tamarind paste
1/2 cup sugar
juice of 2 limes
2 teaspoons salt
Stir-fry components:
2 tablespoons chopped cilantro
4 tablespoons Asian fish sauce
2 tablespoons rice wine vinegar, plus extra for deglazing*
2 tablespoons sugar
1 tablespoon butter
2 eggs
2 tablespoons milk
4 tablespoons peanut oil, divided
2 tablespoons minced shallot
2 tablespoons grated ginger*
3 cloves garlic, minced
1 lb fresh or frozen uncooked shrimp, peeled and deveined
1 cup bean sprouts
Garnishes:
1 cup bean sprouts
1/2 cup chopped peanuts
3 tablespoons chopped cilantro
3 tablespoons sliced green onion
Sriracha
1 lime, cut into wedges
1) Place the rice noodles in a large bowl and cover with hot (but not boiling) water. Let it soak for at least a half hour, or until the noodles are softened, but have a little bite. Then, drain the noodles.
2) Prepare the tamarind sauce. Add the tamarind paste, sugar, lime juice and salt to a small sauce pan and bring to a boil, breaking up the tamarind with a spoon. It should create a thick, sticky sauce. My tamarind paste was not seedless as advertised, and I had to force it through a strainer afterward. (potchke alert) Set aside.
3) Whisk together the cilantro, fish sauce, rice vinegar, and sugar. Set aside.
4) Melt the butter in a large pot or wok. Beat the egg with the milk, add to the pan, and cook until scrambled. Then set aside.
5) Clean out the pan, add 2 tablespoons of peanut oil and set it back on medium-high heat. When the oil is hot, add the ginger, shallot, garlic and shrimp. Cook for one minute, just until the shrimp gets some color. Add the tamarind sauce and the fish sauce mixture, and stir everything together. Add the noodles and toss, stir-frying until they are totally cooked, 5 minutes or so. If things look a little dry, add some extra peanut oil.
6) Garnish and serve!
Ingredients for tamarind sauce
Cooking and breaking down the tamarind
Straining the cursed seeds
Mise en place: drained noodles, peanuts, tamarind sauce, scrambled egg, fish sauce mixture, minced shallot, garlic, and ginger. And-- shout out Rachel Ray-- my garbage bowl!
Everyone in the pool. For more on shrimp, see here.
Finito.
I had a package of rice noodles gathering dust in the pantry for, oh, maybe a year. Then, on a lark, I bought a brick of tamarind paste when I spotted it at a Korean grocery store last week. Pad Thai. It had to be done.
I think this one is pretty self-explanatory. I didn't use any chiles...because I forgot to buy some. But I have to say, the sriracha was key. Personally, I found a healthy squirt of sriracha gave it the perfect amount of heat. Get a big bottle of sriracha! Put it on everything! You won't regret it! Everything else... as usual... is sort about what you have on hand and how much of each ingredient you prefer to use. A little bit more or less of each thing is not going to kill this dish.
* BONUS FACT: Ginger is a lot easier to grate if it's frozen. Bonus bonus fact: freezing things also make them last longer. So, keep a hand of ginger in your freezer and you'll never have to remember to buy it at the store. Slice off one end, and-- you don't even have to peel it-- just grate it right over a microplane. You'll get a perfect, very fine, fresh pile of ginger, every time! Do it!
PS Remember the shrimp-infused peanut oil leftover from shrimp tacos? Use it in the stir fry. Aw yeah.
Homemade Samoas
Cookie Base (from Cakespy)
1 cup (2 sticks) butter, softened
1/4 cup granulated sugar
1/4 cup light brown sugar, packed
2 cups all purpose flour
1/4 teaspoon baking powder
1/2 teaspoon salt
1/2 teaspoon vanilla
2 tablespoons milk or cream
Caramel Base (from Epicurious)
1 cup heavy cream
5 tablespoons unsalted butter, cut into pieces
1 teaspoon fleur de sel*
1 1/2 cups sugar
1/4 cup light corn syrup
1/4 cup water
1 bag of semi-sweet chocolate chips, melted
Cooktime: your whole darned day
Yields: 2-3 dozen cookies
1. Toast coconut. Spread in a thin layer on a baking sheet, and bake for 20-30 minutes at 325 degrees. This can take a while, but be sure
2. Beat sugars and butter. Separately, whisk together dry ingredients. Add dry ingredients to creamed butter and sugar. If the mixture is dry, add the milk until the dough is soft. Form the dough into a disk, and refrigerate till firm. Roll out to about 1/4 inch thickness and cut into desired shapes. Bake at 350 for 12-16 minutes, rotating sheets halfway. Allow to cool completely.
3. Don't do what I did for the caramel. See additional information below.
4. Melt chocolate in the microwave or over a double boiler. I put the chocolate into a ziploc bag, then piped it out.
Toasted coconut; sugar and scalded heavy cream waiting in the background
Cutting out my cookies
Cookies are baked! (They spread a lot, surprisingly. I was not pleased.)
Sugar and corn syrup bubbling away.
Cream and butter added! Action shot.
Mid-decoration.
I have to be honest. I don't think this potchke is worth it. It took almost an entire Sunday, and while delicious, the cookies tasted nothing like samoas. The cookie base tasted more like a buttery sugar cookie-- I had anticipated something more shortbread-y. Next time I'll just go ahead and make a classic shortbread!
Here's the other thing. 99.99% of people on the internet who have made Samoas from scratch did NOT make their own caramel. I mean, what's the point if you're just going to melt store-bought caramels? So I committed to making my own caramel topping, and it just totally bombed. Maybe I mis-measured my cream, maybe my thermometer is off, but my creamy caramel topping hardened into toffee.
I finally polished these cookies off the other day. I came to really enjoy them and eventually overlooked the fact they were nowhere near Samoas.
Tuesday, March 22, 2011
Cranberry Pie
Here's the pie I made on Pi day.
Ingredients (the amounts are pure guesswork, but you kind of can't go wrong):
Frozen puff pastry
4 cups frozen cranberries
1 1/2 cup sugar
1) Preheat the oven to 350 and defrost your puff pastry. If you have the forethought to put it in the fridge a few hours earlier, that's awesome. But I did it in the microwave, which took a few minutes.
2) Cover the bottom and sides of a pie plate with pastry dough.
3) Fill it with cranberries.
4) Cover the cranberries with sugar.
5) Cover it all with more pastry dough, sealing it all along the perimeter. Poke a few holes in the top so steam can escape.
4) Bake for one hour, or until the crust starts to brown and the cranberries are bubbling.
I don't have a photo of the finished product, because I didn't really plan on blogging this. But I couldn't resist! I ate this with Dounia and Will, had some champagne leftover from the Chili Cook-off, and watched the Bachelor finale. It was my 30th birthday.
Spaghetti Bolognese
My very first Bolognese!
(adapted from Anne Burrell.)
Serves 4 with lots of leftover sauce
Serves 8 if you double the amount of spaghetti
Ingredients:
1 large onion, cut into chunks
3 large carrots, ditto
3 ribs celery or a fist-sized celery root, ditto
3 cloves garlic
Olive oil for cooking, and olive oil for finishing*
Salt
2 lbs of ground meat (can be beef, pork, lamb, or a combination)
15 oz tomato paste
2 cups red wine
Parmigiano Reggiano
1/2 lb Spaghetti, fresh or dried
1) Put the onion, carrot, celery and garlic in a food processor and pulse it until it's very finely chopped (but not quite pureed). Heat some olive oil in a large wide pot and cook the vegetable mixture for about 20 minutes until soft and browned. Season it generously with salt.
2) Add your meat and cook it all until browned, about 20 minutes. Season again.
3) Stir in the tomato paste and cook another 5-10 minutes.
4) Add the wine and bring the mixture to a boil, allowing the wine to reduce by about half. This should take 15 minutes or so, but you can eyeball it.
5) Add about 3 cups of cold water-- enough so that the sauce looks like soup; about an inch of liquid above the meat-- and let it all simmer until it looks like sauce again. It should take about an hour. I did this process three times, and the more you add water and keep letting it reduce, the richer the sauce will taste.
6) About a half hour before you are ready to eat, bring some very salty water to a boil and cook your pasta. Drain the pasta, put it in a large serving dish, and toss it with sauce (you will probably only need 1/3 of the sauce you made and will have lots leftover). Serve it with parmigiano reggiano shaved on top, and some nice olive oil.
Every year for my birthday we have a chili cook-off. This year, we had a lot of leftover ground meats and half-used open cans of tomato paste, so I thought a Bolognese would be a great way to use it up. The only downside is that I was already kind of sick of eating chili... and after hours of cooking, I was hit with the realization that I had kind of just made Italian-style chili. But don't get me wrong. It's good! In fact-- I will be so bold as to say it tasted as good as the Bolognese I had in Bologna. It's just a person can only eat meat sauce so many days in a row.
I think this recipe would be just fine after the first addition and reduction of water, but I pushed it to the ultimate because I had time. Though, for the hours that it's reducing, you really can go off and do other things.
Other notes: I used deer, lamb, and beef in my sauce. I had high hopes for an exciting gamey flavor, It basically just tasted beefy. So, truly, any meat can work in this, pretty much. I also used a combo of tomato paste and diced tomatoes. And the amounts of veggies could vary, too. Basically... this recipe takes lots of time, but the beauty is that it's adaptable to whatever you have on hand.
* BONUS FACT: There are lots of different types of olive oils, and they have different uses. Cheap extra-virgin olive oils should be used when you're cooking with heat, as they are not very delicate or flavorful, and when you cook oil to high heat it loses most of it's flavor anyway. Actually, there have been tests done that show how olive oil, canola oil, peanut oil, etc are pretty much indistinguishable in flavor after they've been cooked. SO...if someone gives you a fancy bottle of olive oil, don't waste it by cooking it! Use it for "finishing." Even though these olive oils are pricey, you won't use them in large quantities, and a bottle should last you a long time. Use fancy olive oil for salads, drizzling over the top of a finished pasta dish, or dipping. It is a really easy way to take your meals to the next level!
(adapted from Anne Burrell.)
Serves 4 with lots of leftover sauce
Serves 8 if you double the amount of spaghetti
Ingredients:
1 large onion, cut into chunks
3 large carrots, ditto
3 ribs celery or a fist-sized celery root, ditto
3 cloves garlic
Olive oil for cooking, and olive oil for finishing*
Salt
2 lbs of ground meat (can be beef, pork, lamb, or a combination)
15 oz tomato paste
2 cups red wine
Parmigiano Reggiano
1/2 lb Spaghetti, fresh or dried
1) Put the onion, carrot, celery and garlic in a food processor and pulse it until it's very finely chopped (but not quite pureed). Heat some olive oil in a large wide pot and cook the vegetable mixture for about 20 minutes until soft and browned. Season it generously with salt.
2) Add your meat and cook it all until browned, about 20 minutes. Season again.
3) Stir in the tomato paste and cook another 5-10 minutes.
4) Add the wine and bring the mixture to a boil, allowing the wine to reduce by about half. This should take 15 minutes or so, but you can eyeball it.
5) Add about 3 cups of cold water-- enough so that the sauce looks like soup; about an inch of liquid above the meat-- and let it all simmer until it looks like sauce again. It should take about an hour. I did this process three times, and the more you add water and keep letting it reduce, the richer the sauce will taste.
6) About a half hour before you are ready to eat, bring some very salty water to a boil and cook your pasta. Drain the pasta, put it in a large serving dish, and toss it with sauce (you will probably only need 1/3 of the sauce you made and will have lots leftover). Serve it with parmigiano reggiano shaved on top, and some nice olive oil.
Chopped carrot, onion, celery, garlic
The above, browned
Plus meat
Plus cooked spaghetti
Plus plate, parmigiano, and a little spinach salad
Every year for my birthday we have a chili cook-off. This year, we had a lot of leftover ground meats and half-used open cans of tomato paste, so I thought a Bolognese would be a great way to use it up. The only downside is that I was already kind of sick of eating chili... and after hours of cooking, I was hit with the realization that I had kind of just made Italian-style chili. But don't get me wrong. It's good! In fact-- I will be so bold as to say it tasted as good as the Bolognese I had in Bologna. It's just a person can only eat meat sauce so many days in a row.
I think this recipe would be just fine after the first addition and reduction of water, but I pushed it to the ultimate because I had time. Though, for the hours that it's reducing, you really can go off and do other things.
Other notes: I used deer, lamb, and beef in my sauce. I had high hopes for an exciting gamey flavor, It basically just tasted beefy. So, truly, any meat can work in this, pretty much. I also used a combo of tomato paste and diced tomatoes. And the amounts of veggies could vary, too. Basically... this recipe takes lots of time, but the beauty is that it's adaptable to whatever you have on hand.
* BONUS FACT: There are lots of different types of olive oils, and they have different uses. Cheap extra-virgin olive oils should be used when you're cooking with heat, as they are not very delicate or flavorful, and when you cook oil to high heat it loses most of it's flavor anyway. Actually, there have been tests done that show how olive oil, canola oil, peanut oil, etc are pretty much indistinguishable in flavor after they've been cooked. SO...if someone gives you a fancy bottle of olive oil, don't waste it by cooking it! Use it for "finishing." Even though these olive oils are pricey, you won't use them in large quantities, and a bottle should last you a long time. Use fancy olive oil for salads, drizzling over the top of a finished pasta dish, or dipping. It is a really easy way to take your meals to the next level!
Saturday, March 12, 2011
Hearty Minestrone
(serves 4-6)
2-3 slices bacon, cut into thin strips
1 medium yellow onion, medium dice
1 celery stalk, medium dice
1 carrot, medium dice
2-3 swiss chard ribs (save leaves for later), medium dice
2 cloves garlic, minced
1 tbs. tomato paste
1/2 can crushed tomatoes
4-5 cups chicken stock or broth
1-2 cups sliced savoy cabbage
1-2 cups sliced swiss chard leaves
1-2 cups torn kale leaves
1 can cannelini beans
1 parmesan rind (optional)
salt and pepper
1) Add bacon to a cold heavy-bottom sauce pan and turn the heat on medium-high. Cook until the bacon is crisp and has rendered out the fat.
2) Add carrots, celery, onion, and swiss chard ribs to the bacon and stir. This is the modified "soffritto" base, which is typically carrots, celery, onion (mire poix) + swiss chard ribs and pancetta. Cook until nice and caramelized with lots of brown bits, about 10 minutes. Add garlic and stir until fragrant.
3) Push vegetables to the side and add tomato paste to the pot. Let it get a bit toasty (but not burned), and then stir it into the soffritto mix.
4) Add crushed tomatoes and chicken stock/broth, scraping up the brown bits that have developed on the bottom of the pot. Season with a generous amount of salt and pepper.
5) Add cabbage, chard, kale, and cannelini beans to the pot. Throw in that parmesan rind if you have it (it adds great flavor, but don't go out and buy some!). Cover and let simmer for 30-45 minutes. Taste for salt and pepper and serve!
This is the perfect winter stew, and it freezes beautifully--the first time I made it, I froze it in individual serving-sized tupperware containers, which made the best to-go/re-heatable lunch. The key to making this soup is patience. Cook the soffritto longer than you think you have to! Take the time to toast the tomato paste! And simmer it for a looooong while. The longer the better! The thing I love about making soup is that you can make a day of it, taking your time as you go--and while the soup is simmering you have time to clean up the mess you made! This soup has a nice rich, savory, deep-flavored base (due to the smoky bacon, and also the caramelized soffritto) and tons of hearty vegetables. I read somewhere that this soup should also have noodles, but I don't think it's necessary; I prefer to load it up with healthy greens and beans instead.
In response to Jenny's stock discussion earlier, I would also agree that homemade chicken stock is truly the best here. I didn't have enough of my frozen homemade stuff, so I supplemented it with some boxed broth, but I can attest to the fact that homemade is sooo much richer (I, like Jenny, didn't skim the fat while I was making stock, and really I think it's all the more delicious that way!).
If you want to get fancy, you can finish the soup with a drizzle of really good olive oil, or some snowy parmesan or pecorino cheese, or some torn basil if you've got it (can't wait for summer!)... Bon Appetit!
2-3 slices bacon, cut into thin strips
1 medium yellow onion, medium dice
1 celery stalk, medium dice
1 carrot, medium dice
2-3 swiss chard ribs (save leaves for later), medium dice
2 cloves garlic, minced
1 tbs. tomato paste
1/2 can crushed tomatoes
4-5 cups chicken stock or broth
1-2 cups sliced savoy cabbage
1-2 cups sliced swiss chard leaves
1-2 cups torn kale leaves
1 can cannelini beans
1 parmesan rind (optional)
salt and pepper
1) Add bacon to a cold heavy-bottom sauce pan and turn the heat on medium-high. Cook until the bacon is crisp and has rendered out the fat.
2) Add carrots, celery, onion, and swiss chard ribs to the bacon and stir. This is the modified "soffritto" base, which is typically carrots, celery, onion (mire poix) + swiss chard ribs and pancetta. Cook until nice and caramelized with lots of brown bits, about 10 minutes. Add garlic and stir until fragrant.
3) Push vegetables to the side and add tomato paste to the pot. Let it get a bit toasty (but not burned), and then stir it into the soffritto mix.
4) Add crushed tomatoes and chicken stock/broth, scraping up the brown bits that have developed on the bottom of the pot. Season with a generous amount of salt and pepper.
5) Add cabbage, chard, kale, and cannelini beans to the pot. Throw in that parmesan rind if you have it (it adds great flavor, but don't go out and buy some!). Cover and let simmer for 30-45 minutes. Taste for salt and pepper and serve!
Ingredients
Bacon rendering
The soffritto becoming caramelized
Adding the greens
Soup!
This is the perfect winter stew, and it freezes beautifully--the first time I made it, I froze it in individual serving-sized tupperware containers, which made the best to-go/re-heatable lunch. The key to making this soup is patience. Cook the soffritto longer than you think you have to! Take the time to toast the tomato paste! And simmer it for a looooong while. The longer the better! The thing I love about making soup is that you can make a day of it, taking your time as you go--and while the soup is simmering you have time to clean up the mess you made! This soup has a nice rich, savory, deep-flavored base (due to the smoky bacon, and also the caramelized soffritto) and tons of hearty vegetables. I read somewhere that this soup should also have noodles, but I don't think it's necessary; I prefer to load it up with healthy greens and beans instead.
In response to Jenny's stock discussion earlier, I would also agree that homemade chicken stock is truly the best here. I didn't have enough of my frozen homemade stuff, so I supplemented it with some boxed broth, but I can attest to the fact that homemade is sooo much richer (I, like Jenny, didn't skim the fat while I was making stock, and really I think it's all the more delicious that way!).
If you want to get fancy, you can finish the soup with a drizzle of really good olive oil, or some snowy parmesan or pecorino cheese, or some torn basil if you've got it (can't wait for summer!)... Bon Appetit!
Friday, March 11, 2011
Anita Li Tropical Tacos
Que potchke delicioso!
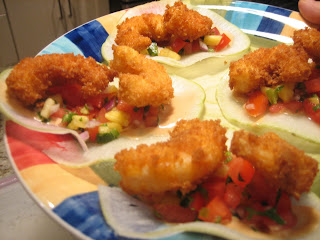
Let's get into it.
(Serves 2)
Chipotle mayonnaise:
1 cup mayonnaise
2 tablespoons adobo sauce from a can of chipotles
juice of 1/2 a lemon (about 1 tablespoon)
1 teaspoon salt
Taco shell:
2 large round jicama roots, ideally about 5 inches in diameter. If too large, it will be too big for a standard size mandolin slicer (if you're using one.)
or 1 large korean radish
Salsa:
2 roma tomatoes
2 pineapple rounds
1 jalapeno
1/2 small red onion
juice from 1/2 lime
1 tablespoon fresh mint
1 teaspoon salt
Fried Shrimp:
about 3/4 lb fresh medium-size shrimp (about 16)
2 tablespoons masa harina, or all-purpouse flour
1 egg
1 cup Panko
1 teaspoon salt
32 oz frying oil (I used peanut)
1) Prepare the chipotle mayonnaise. Whisk together all ingredients and refrigerate.
2) Peel the jicama, or wash the radish. Cut it in half and run it along a mandolin slicer if you have one. Otherwise, make your slices by hand, as thin as humanly possible. You only need 8-10 good ones. Try bending them in the shape of a taco-- if they break, the slices are too thick. Layer them in a container with a few splashes of cold water and refrigerate.
3) Prepare the shrimp by peeling and de-veining them, removing the tails, as well. A good technique, I found, was to hold the shrimp between two hands and pinch the fingers of one hand on the segment above the tail, breaking it off by pinching and pulling in the opposite direction of the shrimp's nature curve, very slowly and deliberately. Phew. If you're lucky, the broken tail will pull out the vein behind it. It's gross, and I will show it in the photos below. Otherwise, make an incision along the back of the shrimp with a small knife, and pull out the vein.
4) Toss the shrimp with the masa harina so they are evenly coated. Beat one egg in a bowl, and pour the Panko into another bowl. Coat the shrimp in egg, then in Panko, pressing the crumbs in a bit with your fingers to make sure they stick. Put them in a container and refrigerate for an hour or so.
5) In the meantime, make the salsa. Core and seed the tomatoes, then dice them finely. Seed the jalepenos and dice very very finely. Dice the onion...finely. And the pineapple...and the mint. Mix it all together and toss with the juice of the lime and the salt. Cover and let sit until you're ready to put the tacos together.
6) About 10 minutes before you're ready to fry, pour all 32 ounces of frying oil into a medium-size high-sided heavy pot. The oil should come up at least two inches high. If you have a candy thermometer, position it in the oil. Heat it on high until it reaches between 350-375 degrees. If you don't have a thermometer, begin with a kernel of popcorn in the oil-- when it pops, it's ready. If you don't have popcorn kernels, you can stick in the end of a wooden spoon. If the oil around it bubbles moderately, it's ready.
7) Have a slotted spoon ready, and a paper towel-lined plate. I like to put paper towels on a baking sheet with a cooling rack on top so that the fried food doesn't sit in its own oil-- it helps keep it super crispy, as the extra oil drips away from it completely onto the baking sheet beneath. Fry the shrimp in two batches for one and a half minutes, tops, dropping them in a few at a time with the slotted spoon, and stirring the around here and there. They should be deep golden brown when they're done. If the shrimp comes out tightly curled, it is over-done.
8) Arrange four taco shells on a plate, and make your tacos! I put the mayo on the bottom, the salsa on top of that, and the shrimp on top. If I could do it all again, though, I might put the shrimp on the bottom and the mayo on the top. Anyway.
Will and I ate these tacos at a restaurant called Anita Li in Guadalajara, Mexico. Then, we got our hands on their very handsome cookbook. Actually, we are supposed to be sharing it with some other friends...but I am hoping that they all forgot about it. It's in Spanish, but easy enough to follow if you are familiar with any Latinate language. I adjusted the recipe a little bit... adding some salt and citrus juice at my discretion...and basically free-styling the whole frying process, since they didn't spell it out at all. So, let me know if you make it, and if anything seemed wonky.
These tacos are that very tasty combo of fresh and bright, fried and crispy, and creamy and spicy. I was extremely bummed that there was no jicama to be found at our market, but then I happened upon the ginormous Korean radish on a separate errand, and I thought it might have the same potato-y crispy water-y vibe. I was happy to find that it didn't have a strong flavor, so it wasn't distracting-- and the texture was right-on. But I did miss the apple-y tangy-ness of jicama.
Both the mayonnaise and the salsa could be made up to a day in advance, and the slices of jicama/radish would probably keep well, too. Good to spread the potchke out over a few days sometimes.
BTW You can re-use your frying oil. Though, only for seafood, because it will reeeeally smell and taste like shrimp. (So will your whole house.) But when you DO get around to frying some seafood in seafood-infused oil, the resulting flavor will probably be the bomb. I poured it through a strainer and back into the bottle it came in, and put it in the fridge. Alternatively, you can pour it all whole-hog into a container and throw it in the garbage.
This would be a great summer outdoors meal! I am in denial.
Let's get into it.
(Serves 2)
Chipotle mayonnaise:
1 cup mayonnaise
2 tablespoons adobo sauce from a can of chipotles
juice of 1/2 a lemon (about 1 tablespoon)
1 teaspoon salt
Taco shell:
2 large round jicama roots, ideally about 5 inches in diameter. If too large, it will be too big for a standard size mandolin slicer (if you're using one.)
or 1 large korean radish
Salsa:
2 roma tomatoes
2 pineapple rounds
1 jalapeno
1/2 small red onion
juice from 1/2 lime
1 tablespoon fresh mint
1 teaspoon salt
Fried Shrimp:
about 3/4 lb fresh medium-size shrimp (about 16)
2 tablespoons masa harina, or all-purpouse flour
1 egg
1 cup Panko
1 teaspoon salt
32 oz frying oil (I used peanut)
1) Prepare the chipotle mayonnaise. Whisk together all ingredients and refrigerate.
2) Peel the jicama, or wash the radish. Cut it in half and run it along a mandolin slicer if you have one. Otherwise, make your slices by hand, as thin as humanly possible. You only need 8-10 good ones. Try bending them in the shape of a taco-- if they break, the slices are too thick. Layer them in a container with a few splashes of cold water and refrigerate.
3) Prepare the shrimp by peeling and de-veining them, removing the tails, as well. A good technique, I found, was to hold the shrimp between two hands and pinch the fingers of one hand on the segment above the tail, breaking it off by pinching and pulling in the opposite direction of the shrimp's nature curve, very slowly and deliberately. Phew. If you're lucky, the broken tail will pull out the vein behind it. It's gross, and I will show it in the photos below. Otherwise, make an incision along the back of the shrimp with a small knife, and pull out the vein.
4) Toss the shrimp with the masa harina so they are evenly coated. Beat one egg in a bowl, and pour the Panko into another bowl. Coat the shrimp in egg, then in Panko, pressing the crumbs in a bit with your fingers to make sure they stick. Put them in a container and refrigerate for an hour or so.
5) In the meantime, make the salsa. Core and seed the tomatoes, then dice them finely. Seed the jalepenos and dice very very finely. Dice the onion...finely. And the pineapple...and the mint. Mix it all together and toss with the juice of the lime and the salt. Cover and let sit until you're ready to put the tacos together.
6) About 10 minutes before you're ready to fry, pour all 32 ounces of frying oil into a medium-size high-sided heavy pot. The oil should come up at least two inches high. If you have a candy thermometer, position it in the oil. Heat it on high until it reaches between 350-375 degrees. If you don't have a thermometer, begin with a kernel of popcorn in the oil-- when it pops, it's ready. If you don't have popcorn kernels, you can stick in the end of a wooden spoon. If the oil around it bubbles moderately, it's ready.
7) Have a slotted spoon ready, and a paper towel-lined plate. I like to put paper towels on a baking sheet with a cooling rack on top so that the fried food doesn't sit in its own oil-- it helps keep it super crispy, as the extra oil drips away from it completely onto the baking sheet beneath. Fry the shrimp in two batches for one and a half minutes, tops, dropping them in a few at a time with the slotted spoon, and stirring the around here and there. They should be deep golden brown when they're done. If the shrimp comes out tightly curled, it is over-done.
8) Arrange four taco shells on a plate, and make your tacos! I put the mayo on the bottom, the salsa on top of that, and the shrimp on top. If I could do it all again, though, I might put the shrimp on the bottom and the mayo on the top. Anyway.
The handsome cookbook
Chipotle mayo
Slicing the radish
Radish tortillas!
Shrimp step 1: Pinch above the tail
Shrimp step 2: Break the tail off firmly-- but gently!
Shrimp step 3: Pull out the vein! Gross! (And then take the shell off.)
Harina-coated shrimp, and the dredging station
Fridge-ready shrimp
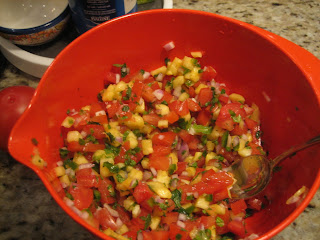
Salsa
Frying the shrimp
Radish tortillas!
Shrimp step 1: Pinch above the tail
Shrimp step 2: Break the tail off firmly-- but gently!
Shrimp step 3: Pull out the vein! Gross! (And then take the shell off.)
Harina-coated shrimp, and the dredging station
Fridge-ready shrimp
Salsa
Frying the shrimp
Will and I ate these tacos at a restaurant called Anita Li in Guadalajara, Mexico. Then, we got our hands on their very handsome cookbook. Actually, we are supposed to be sharing it with some other friends...but I am hoping that they all forgot about it. It's in Spanish, but easy enough to follow if you are familiar with any Latinate language. I adjusted the recipe a little bit... adding some salt and citrus juice at my discretion...and basically free-styling the whole frying process, since they didn't spell it out at all. So, let me know if you make it, and if anything seemed wonky.
These tacos are that very tasty combo of fresh and bright, fried and crispy, and creamy and spicy. I was extremely bummed that there was no jicama to be found at our market, but then I happened upon the ginormous Korean radish on a separate errand, and I thought it might have the same potato-y crispy water-y vibe. I was happy to find that it didn't have a strong flavor, so it wasn't distracting-- and the texture was right-on. But I did miss the apple-y tangy-ness of jicama.
Both the mayonnaise and the salsa could be made up to a day in advance, and the slices of jicama/radish would probably keep well, too. Good to spread the potchke out over a few days sometimes.
BTW You can re-use your frying oil. Though, only for seafood, because it will reeeeally smell and taste like shrimp. (So will your whole house.) But when you DO get around to frying some seafood in seafood-infused oil, the resulting flavor will probably be the bomb. I poured it through a strainer and back into the bottle it came in, and put it in the fridge. Alternatively, you can pour it all whole-hog into a container and throw it in the garbage.
This would be a great summer outdoors meal! I am in denial.
Wednesday, March 9, 2011
Ben and Jerry's Late Night Snack Hack
I couldn't find it in Montreal, so I had to make it myself.
Vanilla ice cream, Philadelphia style* (from David Lebovitz's The Perfect Scoop):
3 cups heavy cream
3/4 cup sugar
1 vanilla bean
3/4 teaspoon vanilla extract
pinch of salt
Extra-Salty Caramel Swirl (adapted from DL's The Perfect Scoop):
3 tablespoons butter
1/2 cup sugar
1/2 cup heavy cream
1/4 teaspoon vanilla extract
1 teaspoon course salt
Chocolate-covered potato chips:
1 cup semi-sweet chocolate chips or 3 squares semi-sweet baking chocolate
3 handfuls potato chips (I used Ruffles, in honor of the Humphry Slocombe scandal)
1) To make the ice cream, pour 1 cup of cream into a saucepan, add 3/4 cup sugar and a pinch of salt. Scrape the seeds from the vanilla bean into the saucepan and add the pod, as well. Stir over medium-heat until the sugar is dissolved, them remove from the heat. Add the 2 remaining cups of cream and vanilla extract, then put it in the fridge to chill for two hours (or until you're ready to make the ice cream).
2) In the meantime, rig a double-boiler to melt your chocolate. Or, you can do it in 15 second increments in the microwave, stirring in between each zap. I put a heat-proof bowl over a pot of boiling water and stirred the chocolate until melted.
3) In the meantime, put four handfuls of potato chips in a bowl and smash them up a little bit (better for making clusters later).
4) When the chocolate is melted, pour it over the chips and stir. Lay out a sheet of waxed or parchment paper on top of a plate or cutting board, pour the chips onto it, and spread them out a bit. Put the whole apparatus in the fridge to harden.
5) To make the caramel, begin by melting the butter in a high-sided saucepan. Once melted, stir the 1/2 cup sugar. Let it cook, stirring often, until deep golden brown and just starting to smoke. Remove from heat and whisk in half of the cream. Careful-- it will steam up! Once smooth, stir in the rest of the cream, the vanilla, and the salt. If you have lumps, rewarm on the stove and keep whisking. Cover and let it chill in the fridge.
6) Once the ice cream base is chilled, take the chips out of the fridge and break into chunks. Take the ice cream base out of the fridge and remove the vanilla bean (you can save the bean and use it for infusing again in the future).
7) Get your ice cream maker set up, then churn the ice cream. Once it's churned, stir in the chocolate-covered potato chips. (The chunks are too large to add while churning-- the paddle won't be able to hand it.)
Note: If the ice cream is quite liquidy, put it in a container and let it firm up some more in the freezer for a few hours. Otherwise, when you layer it with the caramel, it will all blend into each other, like mine did. (Still delicious, but I wanted that SWIRL, dammit!)
8) Spoon the ice cream into your preferred ice cream receptacle (if it's not too liquidy!), followed by a layer of caramel, alternating until the container is full. Throw it in the freezer for a few hours for a firmer consistency. Or eat it immediately for an excellent soft-serve experience.
Melting chocolate in the boiler; crunched up chips at the ready
Freshly chocolate-ed chips
Finished caramel, ready to go in the fridge
Prepping the vanilla ice cream base
The sum of the parts:
Freshly chocolate-ed chips
Finished caramel, ready to go in the fridge
Prepping the vanilla ice cream base
The sum of the parts:
I am basically on the internet most hours of the day, so I was there the moment this new flavor dropped. And I was pumped. However, I was not pleased to find that the Ben & Jerry's franchises in Montreal didn't have it in stores, yet, nor did they have any idea when to expect it. "Maybe this summer?" Uuuuuugh, I'm still waiting for SPRING. I considered driving to Burlington last weekend just to see if I could get some at the flagship. And eat Chinese food at a Single Pebble. And shop at Williams-Sonoma. But I didn't. Instead, I decided to take matters into my OWN HANDS. Truthfully, this was supposed to be a potchke of epic proportions, since I planned on making the far superior custard-based ice cream-- *record needle scratch*
* BONUS FACT: There are two traditional styles of ice cream-- custard-based and Philadelphia-style. A custard base involves heating egg yolks and slowly stirring in the cream, making a...custard. It makes the texture way richer and smoother, but is a potchke, and I'm sure I'll post about the process in the future in more detail. Philadelphia-style doesn't involve eggs and is much less of a potchke, but it freezes harder and the texture isn't as nice. *needle drops back onto record*
-- but I didn't have enough eggs! So I went with Philadelphia-style. The upside was less dishes and equipment, so I was not too sad. Anyway, none of the individual components of this ice cream are too much of a potchke, but all-told, it was a substantial project.
Was it worth it? Yes. I didn't even miss the custard in the ice cream because of all the other deliciousness going on. Salty, crunchy, vanilla-y and chocolate-y all in one cold, creamy, melt-y perfect package. But I will still need to get my hands on the Ben and Jerry's version for scientific comparison.
Buon appetito.
Subscribe to:
Posts (Atom)